Description
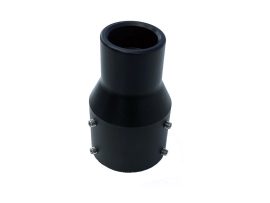
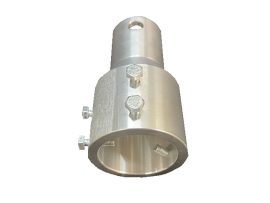
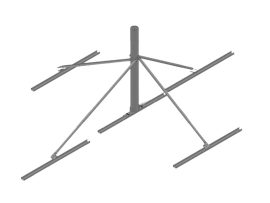
SLSAMv2 Starlink Pole/Pipe Adapter
Suitable for Gen2 / “Standard Actuated” Starlink Dishes
Fits 25-50mm mast/pipe/pole
Comes with 6 stainless steel grub screws
Diecast Aluminium Alloy
Made in Taiwan
Instructions
Simply slide the adapter onto an existing Mast, Pipe or Pole, tighten bolts (do not over tighten) and clip you Starlink Dishy into the top with easy clip removal and protecting Starlink Dishy warranty.
For a tin roof installation, combine this Starlink Pole Adapter with a 40mm Satellite Tin Roof Mount.
For more information on Starlink please visit www.starlink.com
What is Starlink?
Starlink is the world’s first and largest satellite constellation using a low Earth orbit to deliver broadband internet capable of supporting streaming, online gaming, video calls and more.
Leveraging advanced satellites and user hardware coupled with our deep experience with both spacecraft and on-orbit operations, Starlink delivers high-speed, low-latency internet to users all over the world.
How Starlink Works
Most satellite internet services come from single geostationary satellites that orbit the planet at 35,786 km. As a result, the round trip data time between the user and satellite—also known as latency—is high, making it nearly impossible to support streaming, online gaming, video calls or other high data rate activities.
Starlink is a constellation of thousands of satellites that orbit the planet much closer to Earth, at about 550km, and cover the entire globe. Because Starlink satellites are in a low orbit, latency is significantly lower—around 25 ms vs 600+ ms.
Where is best to Install Starlink Dish
The best area to install a Starlink dish depends on several factors, but here are some general guidelines to consider:
- Clear Line of Sight to the Sky: The Starlink dish requires a clear line of sight to the sky to establish a connection with the satellites. Avoid obstacles such as tall buildings, trees, and other structures that might obstruct the view.
- Elevation: Ideally, the dish should be installed in an elevated position to maximize its view of the sky. Placing it on the roof of a building or in an open area can be beneficial.
- Avoiding Interference: Try to minimize potential sources of interference. Metal structures, electronic devices, or other obstacles could affect the signal quality. Keep the dish away from these potential sources of interference.
- Stability: Ensure that the installation site provides a stable and secure mounting surface. The dish should be firmly fixed to avoid movement, especially during adverse weather conditions.
- Cable Routing: Consider the location of the cable entry point into your home or building. The cable should have a clear path to reach the Starlink router inside.
- Local Regulations: Check with local authorities or homeowner associations to ensure that you comply with any regulations or guidelines regarding the installation of satellite dishes.
- Weather Considerations: While the Starlink dish is designed to withstand various weather conditions, you might want to consider the climate in your area. For example, if you live in an area prone to heavy snowfall, you may need to take that into account when choosing the installation location.
Keep in mind that the specific requirements for installing a Starlink dish may vary, and it’s advisable to refer to the official Starlink installation guidelines provided by SpaceX. Additionally, you may want to use tools or apps that help identify the best location based on the current position of Starlink satellites in the sky.